Monday, December 19, 2016

DIY Flocked Christmas Tree


Every year right after Thanksgiving, we march down to the grocery store and buy a live Christmas tree.  I've wanted a flocked tree for years and years, but for some reason I can't bring myself to spend $250 on one from our local nursery... Call me crazy, but that's a pretty penny for something that will live in my house for about one month.

However, I do just LOVE the way it looks... something about a white tree conjures up images of a classic vintage Christmas for me.  Added bonus that brightly colored ornaments really pop off of the white background!

So, after a little bit of research, I decided to flock our store-bought tree myself.  Mark was initially very hesitant (read: worried he would get stuck cleaning up a colossal mess of white fluff mixed with my tears of frustration) but I forged ahead on my own.  I ordered some Sno Bond, and everything else I had in my house already.  Read on for my how-to!

HOW TO FLOCK YOUR CHRISTMAS TREE

Supplies:
  • Sno Bond (I ordered 2 lbs for a 6'6" tree and used about 1/2 the bag... This will depend entirely on how heavy handed you are)
  • Fine Mesh Strainer (I used the medium strainer from this set)
  • Spray bottle (great to have on hand for misting orchids or naughty cats on your kitchen counter)
  • Towels or newspaper
Instructions:
  • Pre-String your lights onto your tree.  Ours are rated for outdoor use, so they are safe to get wet. If you put lights on later, you'll be sorry - and covered in white fluff!
  • Move any furniture close to the tree out of the way and cover the area beneath your tree in towels or newspaper. This flocking method is pretty clean and tidy, but you will have a light dusting of the Sno Bond on the floor when you are finished.  
  • Pour some Sno Bond into a large mixing bowl, fill your spray bottle with water, and grab your strainer. 
  • Start at the top of your tree and work your way down - this creates a snow-fall effect that is much more natural than a sprayed-on flock you will find at most nurseries.  
  • spray a small section of your tree with water (a few branches at a time) and then dust on the Sno Bond powder with your strainer.


(I learned the hard way that I needed to have a bowl down under the tree - can you see my snow residue on the carpet? Oops!)

  • The powder will adhere to anything wet, forming a paste, so it is important to cover your rugs, hardwoods, etc.  I learned this the hard way and was scraping a white paste off of my wood floors (yuck).
  • Continue to work your way down the tree in small sections until you have reached your desired level of snow.  I went back over a few areas that had not received as heavy a snow fall as others.  
  • Let your tree dry overnight before adding any ornaments, etc.  Throw away your newspaper/floor cover the next day, and step back to admire your handiwork. 
  • This whole project took me less than one hour, and was way less painful on the pocketbook than buying a flocked tree.  I think you could even do this on an artificial tree, but I would practice first to make sure you love the look! 
  • Have any of you ever flocked your own tree? Have any pointers I should add to the list? I'd love to know!
  • And now, some more photos of the complete tree in its full frosty glory!
I was really hoping to get these two wingback chairs recovered in time for Christmas, but the old fabric back-order strikes again!

I use a combination of vintage glass ornaments in multiple bright colors - Shiny Brites are the best - if you can find them, they are magical


Merry Christmas! 
Xo
Ivy

Wednesday, October 12, 2016

Orchid Lessons

Wow! I took quite the September hiatus ...whoopsie!  This fall has been a busy one - we've done some traveling, cheered on OU football, and I've started a vintage flash sale account (Visit me on @houseofivyvintage) which has been occupying a lot of my free time - but more on that later!

Today, I want to impart some orchid wisdom I've learned over the years.  No, I don't mean how to keep them alive longer than two months - I'm still trying to figure that out myself! This is more a lesson in orchid arrangement and presentation, which is something I feel makes a huge difference in your decor.

What would you rather showcase in your home, a straight-outta-whole-foods mauve ceramic potted orchid? Or this:


That's what I thought... Read on for my first installment of "Orchid Lessons"!

Start with your basic store bought Phalaenopsis orchids - any size will do.  I chose this short variety because I wanted this arrangement to live on our island (I've tried it with taller Phales and they knocked into my pendant lights). Trader Joe's has excellent prices and in my experience, they are great quality.  Remove from their little pots, but keep the plastic containers intact - I don't pretend to be an expert at re-potting orchids, so please keep them in their original homes!

Select your container - I used this fabulous antique revere bowl I found while out thrifting one day, but I have used a large variety of planters, bowls, even silver champagne buckets for orchids in the past! The key here is to get your scale right... make sure your container provides plenty of visual weight to counter balance your orchids.

Stuff your container with newspaper, styrofoam, etc to provide some padding for the plastic root pots. I like to also fill in with rocks or pebbles to provide some weight which keeps the tall stems from toppling over.

Place your plastic root pots in the bowl and continue adding rocks until you feel they are secure. This is a good time to make sure your buds are facing in the direction you want.  

Make sure you don't cover up the roots, just around them. You want them to be able to breathe.

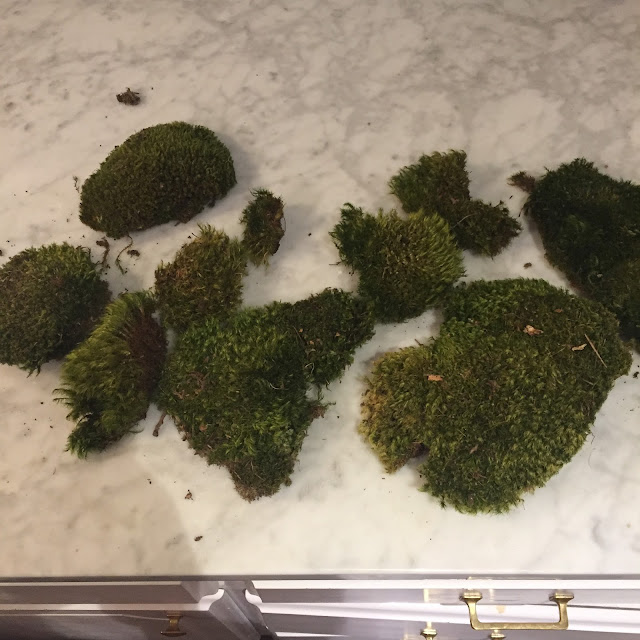
Gather up some moss (Ladies of OKC, I get my moss from Calverts!) and moisten it under running water.  This make sit a little more malleable and easy to work with.

Begin to cover your rocks and plastic pot edges with moss. Don't be afraid to break your big moss chunks up into smaller bits to fill in any holes.

Again, leave the majority of your roots exposed for air flow - this is also where you will water each plant!

Finished "mossing" my bowl, onto the next part!

You can stop here, but it feels a little like an outfit that hasn't been accessorized yet...

You can find a variety of good sticks and accents to add to your orchid arrangement. My favorite is these dried curly sticks - I'm not sure what they are called, but again I found them at Calverts in OKC! You can also use driftwood, branches, or even lucite support rods (sooooo chic) to round out the look.

I cut mine down to fit the shorter arrangement height.  

Gently poke your accessories into your moss - the rocks and/or foam will hold them in place.

I also love adding these faux moss balls in there for some dimension.  You can also add quartz crystal points, seashells, succulents, etc.  You really can have a lot of fun with them, I've even seen porcupine quills stuck in there - so fun! With that, I'm finished!

The final product - much better than a little ceramic pot I think!

Happy arranging friends!
Xx
Ivy


Wednesday, August 31, 2016

Darling Doggy Beds

To tell you the truth, I get a HUGE kick out of helping my friends solve their design dilemmas. Recently, my girlfriend asked me for some cute dog bed suggestions, and I realized they are a little hard to find if you don't know where to look.  The typical dog bed is khaki, brown, and U-G-L-Y, but this doesn't mean your best four-legged friend has to suffer... Give him a bed fit for a king (and hopefully he will stay out of yours!) he deserves it!


1) If you love Lilly Pulitzer, trust me this is the dog bed for you!
2) We have this bed for Greta in black, and of course I love the leopard print!
3) Amy Berry's beds are the end-all-be-all of chic canine sleeping arrangements.
4) Another Harry & Barker bed, the "Envelope" style is so cute!
5) For the pint-sized pooch (or kitty cat) or just the pineapple lover!
6) This one is totally impractical, but adorable!
7) If you love Quadrille fabrics, you'll love this ikat bed!
8) You can never go wrong with classic black and white!

Any cute resources I'm overlooking? Please share if so!

Xx
Ivy


Tuesday, August 16, 2016

J'adore Antelope

After last week's Instagram post, I got several questions about my entry runner.  I purchased mine from Stark a few years back, and it has proven to be a great investment! I have used it in the entry of my post-collegiate apartment, my blue bathroom at our current house, and finally in our entryway, where I think it is going to stay a while.


Fritz camouflaging 


I'm definitely not the first designer to tout the beauty of an antelope rug... Shelter mags like Domino have been showing us how to use them for years, so I am hardly a trendsetter here.  All I know is that antelope is a classic, and is most likely going to be in my design repertoire for a long time.  The pattern is the perfect neutral and will complement almost any color scheme and design style.  Added bonus - the pattern conceals spills, dirt, etc. so it is perfect for young families or people with pets.  Case-in-point: this is the only rug in our house that doesn't reveal the massive amounts of dog hair we deal with!

Now that you've seen my entry, below are some of my all-time favorite Antelope installations! P.S. I'm considering a black and white stripe above the chair railing in this space... tres chic? or too much?

The Decorista

Bailey McCarthy

House Beautiful

Vogue


While I of course love Stark's classic design, Ballard has a great budget-friendly option that comes in a variety of sizes! Your local carpet supplier will also have a few great options, and you may even find a remnant which can cut your cost down considerably.

Entry Sources
Rug: stark
Demilune Table: Wisteria
Dried boxwoods: West Elm
Umbrella Holder: Vintage
Blue and white box: Vintage
Bamboo mirror: Local consignment shop find!


Xo
Ivy


Friday, July 22, 2016

Office Inspiration

T.G.I.F!! I'm back again - to say it's been a busy month would be a vast understatement, and I've been seriously neglecting this blog!

I've been dying to transform our middle bedroom into a proper office for a long time... I've just installed a gorgeous commercial office (more to come on that) for some clients, and I'm newly inspired to make over my own space.  Yes, I do the majority of my design work at our store, but I feel like I need a designated space to work on this blog, keep track of administrative stuff around our house, etc. And as if I needed any more excuses to start this new project... just look at this pretty inspo I've been hoarding!

(all images via Pinterest)


This was initially going to be Mark's office/man-cave - in all seriousness, he thought he was going to adorn this room with a plethora of taxidermy and golf equipment... with a little bit of an "office" thrown in there too.  However, after two years of domestic bliss, the man has still done nothing with this room besides throw random crap in there.  Thus, I have commandeered it for my own use.

Currently this room houses our two large dog crates, which I can't bring myself to keep outside in the garage.  The dogs very much enjoy sleeping in their own "houses" when they need a private moment, so they must stay.  I have a plan to conceal one of these crates, so stay tuned for that project.  The organizational process has been a real doozy (we are two self-proclaimed pack rats) but I've finally got a blank slate to work with! See my sketch below:

My punch list for this room:
  • custom window cornice
  • inexpensive bamboo shade
  • use existing rattan desk (vintage) and matching chair
  • paint (2) craigslist-found bamboo etageres light blue 
  • pull in pink velvet wingback from master bedroom (I should think husband will enjoy removal of pink from his boudoir) 
  • create a skirted table out of the "house crate" ... more to come on that one.  
  • conceal gray plastic "travel crate" in corner
  • hang mirror & inspiration board 
  • swap ceiling fan for new gold light fixture 
I've put together little mood board (treating myself like a real client) to get me in the spirit!


I have a weekend at home with no plans for the first time in a very long time, so hopefully I can get some work knocked out.  Stay tuned for the transformation!

Xx
Ivy

Friday, June 17, 2016

Craigslist Commandments


One of my all-time favorite Craigslist purchases - this green cabinet - was a diamond in the rough.

So I know almost everyone in the english-speaking world has heard of Craigslist - but to my amazement, I've discovered that a ton of my friends are not frequent buyers or sellers!  It's my understanding this lack of involvement usually stems from a lack of knowledge about the site and it's many intricacies - spoiler alert people, it's not rocket science!

I love the thrill of the treasure hunt, and just like estate sales, you never know what you'll find in you own backyard.  Truth be told, I have absolutely driven 40 miles away for a really great purchase, and I'm not ashamed.  I think my husband would probably kiss the ground I walked on if I swore off Craigslist for good (Sorry Mark, you married an addict) but I just simply can't give it up.

We drove almost an hour to get this little brass table once... I'm a woman possessed! 

I started Craigslist-ing when I was in college and have amassed a little set of "rules" I try to follow to ensure that A) I am always safe and B) I always find the best deals!  Below are my ten commandments of Craigslist:


FOR  BUYERS:

1) Thou Shalt ask questions - If you are unsure about an item, it never hurts to ask for additional photos, measurements, details, etc.  I have purchased quite a few items that upon first glance were not so great, but looked much better from a different angle!

2) Use thy imagination - Craigslist is the ultimate place to find a fixer-upper.  I purchased the chest in my living room (above) off Craig's, sanded it down, added many coats of green glossy paint, new hardware, and voila! It's always important to remember that one man's trash could be your new treasure!

3) Thou shalt not pay full price - I ALWAYS offer lower than the asking price.  Typically sellers build a little wiggle room into their pricing anyways for negotiations (at least I always try to).  Even if they only knock off $5, I love the feel of a good bargain!

4) Pick up thine own purchases - this is a simple courtesy, but some buyers overlook the fact that the seller is not here to provide them with free delivery service.  Offer to pick up your purchase yourself, and if you simply are not able, offer some extra cash if the seller can provide delivery. Simple as that.

5) Limit thy communication to normal waking hours - nothing is more inconsiderate to me than someone texting me at 1am asking to buy one of my ads (I could rant for days about late-night texters).  I too enjoy a good Craigslist trolling session when I can't sleep, but generally I try to follow this simple rule: If I wouldn't text a client at this time of night/morning, I won't text a seller.


FOR  SELLERS:

6) Thou shalt never advertise thine own address - this one seems like a no-brainer, but I have seen several postings that go something like this "I live at 1234 Sunny Rd and I'm not home from work until 5:30, so please don't come before then" - these people are basically begging to get robbed.  I arrange the pick-up time with my buyer, and have them call me when they are on the way. Only if I am home do I give my address - very simple.  I do like to provide a general area, cross streets, etc. so the buyer can have an idea of how far apart we are.  I think it should go without saying that this rule also applies to your children when posting ads for children's furniture, etc.  Perhaps I am just paranoid, but If I were the "Craigslist killer" I'd sure look for the seller with lots of kids in their photos...

7) Meet up with thy neighbor - I did a lot of Craigslist purchasing when I lived in my "single girl" apartment, and I did not want some random dude who may or may not be a serial killer seeing where my roomie and I lived... alone (do you sense a paranoia theme yet?).  In those days was a big fan of the "let's meet up at the parking lot of Target".  A well-lit area with lots of bystanders is key, and it goes without saying that you shouldn't do a meet-up after dark.  Bringing a friend along is always a good idea.

8) Have a man at thy house - this may be a little old-fashioned of me, but I always like to mention the fact that my husband will be home when a buyer comes over.  Even mentioning that your boyfriend, roommate, next door neighbor will be "around to help with the heavy lifting" is good.  Anything you can do to let a potential buyer know that you will not be home alone!

9) Thou shalt not accept personal checks - I always include "cash only, no checks" in my ads.  I assumed this was a no-brainer, until one day these really sweet girls came over to purchase a dresser from me, hauled it down two flights of stairs, loaded it up in their friend's truck, and handed me a check.  I had to awkwardly explain to them that I didn't know them from Adam and would they please pay me in cash. Laying your ground rules out in your postings can help smooth over an otherwise uncomfortable situation.

10) Do thy research prior to posting - Craigslist is not 1st Dibs.  It's not even Ebay.  You are never going to get as much cash for an item as you originally put into it.  It took me some time to figure this one out.  When I first began selling things around my house, I would ask way too much and the postings would get no traction.  Eventually I learned to research my market a little better before posting.  For example - if I have a small bench I want to sell, I take a look at what other sellers are listing their benches for and compare the condition, size, age, etc. to my piece.  I find that if I price competitively, my pieces sell pretty quickly!

Do any of you have any tips or tricks that I'm missing out on?  Hoping this post inspires you to do a little Craigs creeping for yourself!

Xx
Ivy


Thursday, June 16, 2016

Summer To-Do List


CZ Guest at home in Palm Beach - Photographed by Slim Aarons


With a new season just around the corner, there's no better time to make a new checklist.  If you read this post, you'll have noticed that I tend to over-committ myself when it comes to these seasonal goals - hopefully I can check each one of these fun activities off the list by Fall!

1) Learn to Water Ski (finally) - This one might be a bit ambitious, but I'm hoping to make it out to the lake often enough to give it a solid try!
2) Celebrate our 1st wedding anniversary - They say your first year gift is "paper"... Do you think furniture counts?  Paper is made from wood... sales receipts are paper... I'm reaching here...
3) Set up my home office once and for all.  This room tends to get the short end of the cleaning stick (it currently houses everything random we own, my desk, and dog crates) so I plan to pay some extra special attention to it!  Now that I have been blogging for a few months, I need a more inspirational work space than my bed/sofa.
 4) Attend a "few" weddings - tis the season, and love is in the air! I'm so excited to be included in the nuptials of some very dear friends this summer.
5) Install new front door hardware - finally purchased! Just need it installed... hint hint, Mark!
6) Play more tennis - I fell off the weekly play-date wagon with some of my girlfriends during the colder months... now that we can play outside I have no excuse!
7) Finalize selections for the Traverse City project - I have a trip to Michigan planned for later this summer to do a little bit of work with the 'rents (oh and some play as well!)
8) Install an amazing new office at Chisholm Creek - this one is near and dear to my heart, and I can't wait to share the final outcome!
9) Master my grandmother's homemade peach ice cream - it wouldn't be summer to me without a taste of farm-fresh peaches.  I'll be sure to share the recipe!
10) Host a summer cookout for friends - I'm thinking casual burgers and tons of delicious sides like this and these. If you're intimidated by grilling your own meat (I always have Mark do it for fear I will undercook it) check out these must-have grilling tips that have helped demystify the grilling process for me!

What are your summer goals? 

Xx
Ivy